![]()
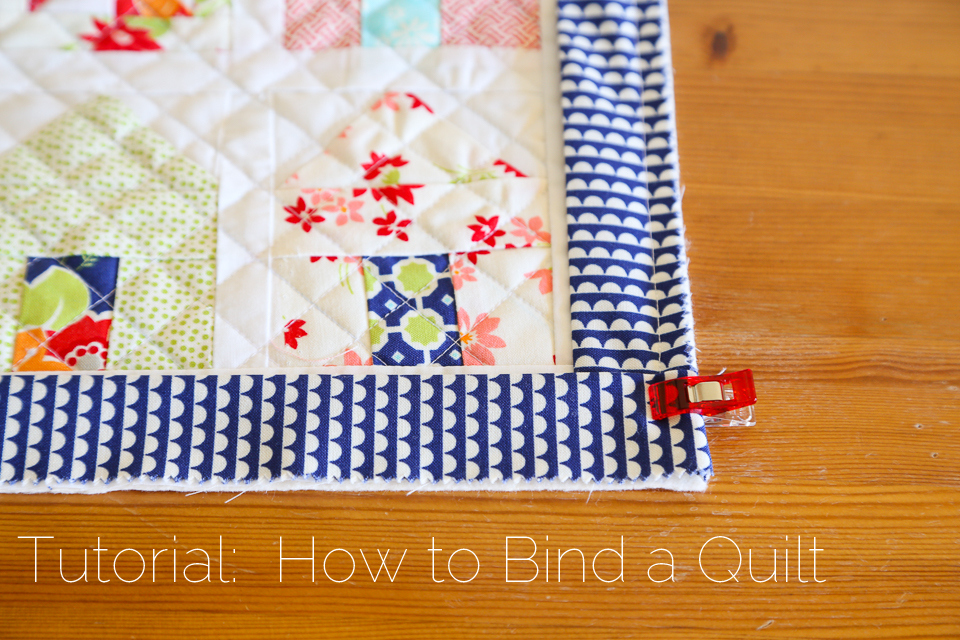
For some folks, the last part of the quilt may be the hardest or most tedious, that is finishing the quilt by binding it all together. It requires precision in maintaining straight lines and perfect folds. Thanks to my OCD/Type A personality, this process is the most fun for me! I love straight lines, straight edges, and right angles! This is a tutorial on how to bind a quilt. I use the double fold binding method.
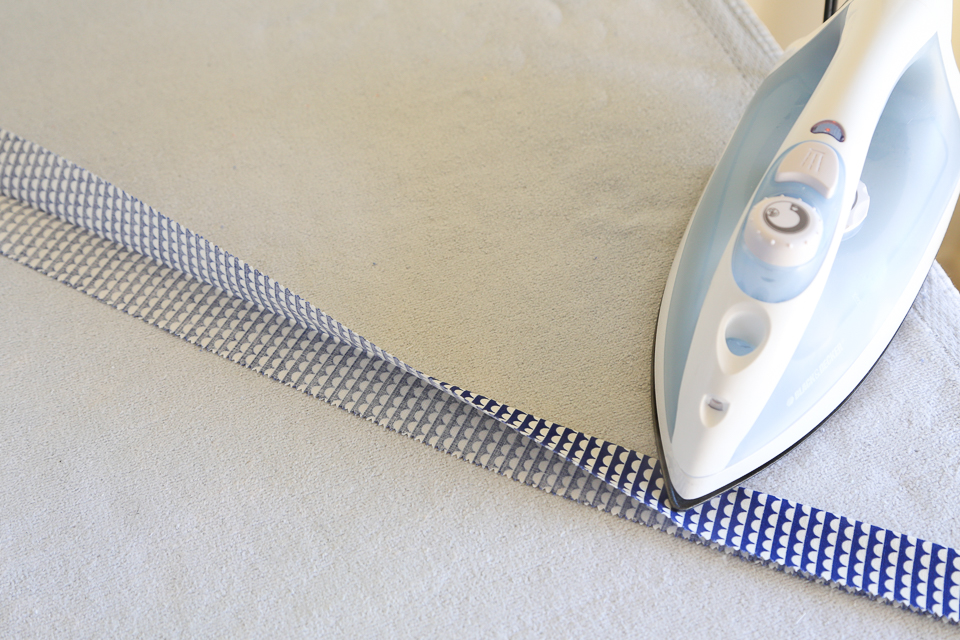
Start with a jelly strip (a strip of fabric that is 2.5″ wide by 44″ long – Learn how to cut your own jelly roll strips here.) Fold in half and press to set crease.
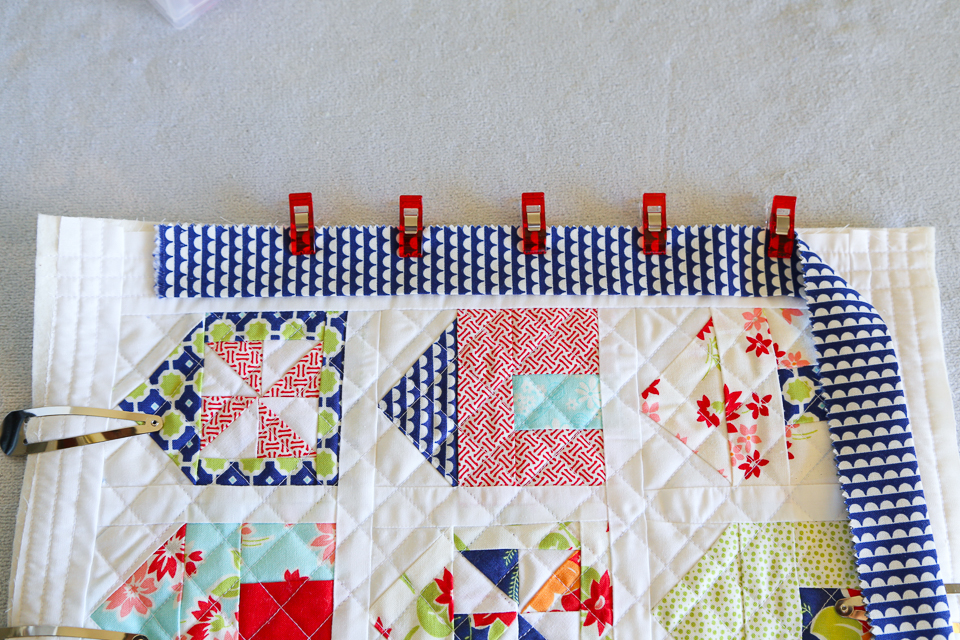
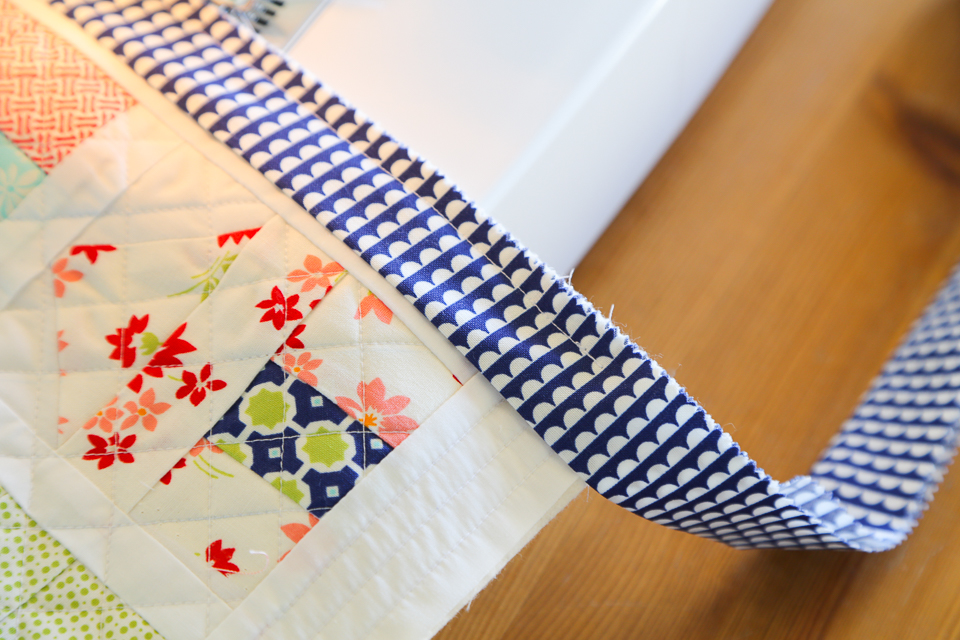
![]() Attach the strip raw side outwards along the quilt edge. It’s better if you do not start lining right from the corner because corners requires special attention – you’ll see. I like to use both clover clips and the giant hair clips. Holds everything down tight!
Attach the strip raw side outwards along the quilt edge. It’s better if you do not start lining right from the corner because corners requires special attention – you’ll see. I like to use both clover clips and the giant hair clips. Holds everything down tight!
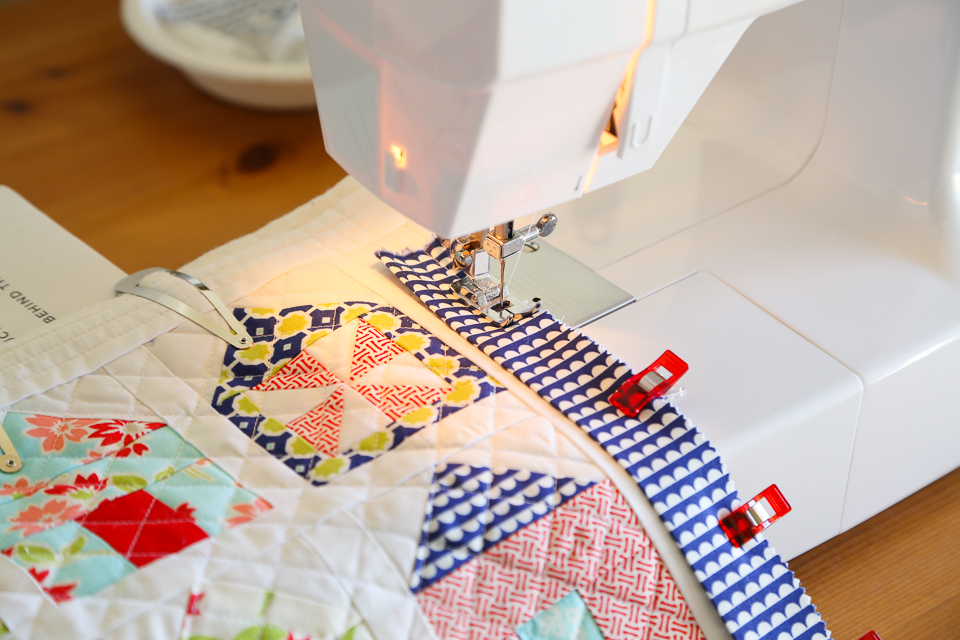
![]() Start sewing with a 1/4″ seam allowance.
Start sewing with a 1/4″ seam allowance.
![]() When you come to arrive at the corner, stop just before 1/4″ from the bottom edge. Back stitch a few stitches to secure the binding in place. Remove from sewing machine.
When you come to arrive at the corner, stop just before 1/4″ from the bottom edge. Back stitch a few stitches to secure the binding in place. Remove from sewing machine.
![]() I am a fan of the mitered corner. That is, a corner that meets at a diagonal, as opposed to a binding corner that is perpendicular to each other. I think a mitered corner looks much neater. To make a mitered corner, take your binding over to the right to make a diagonal corner.
I am a fan of the mitered corner. That is, a corner that meets at a diagonal, as opposed to a binding corner that is perpendicular to each other. I think a mitered corner looks much neater. To make a mitered corner, take your binding over to the right to make a diagonal corner.
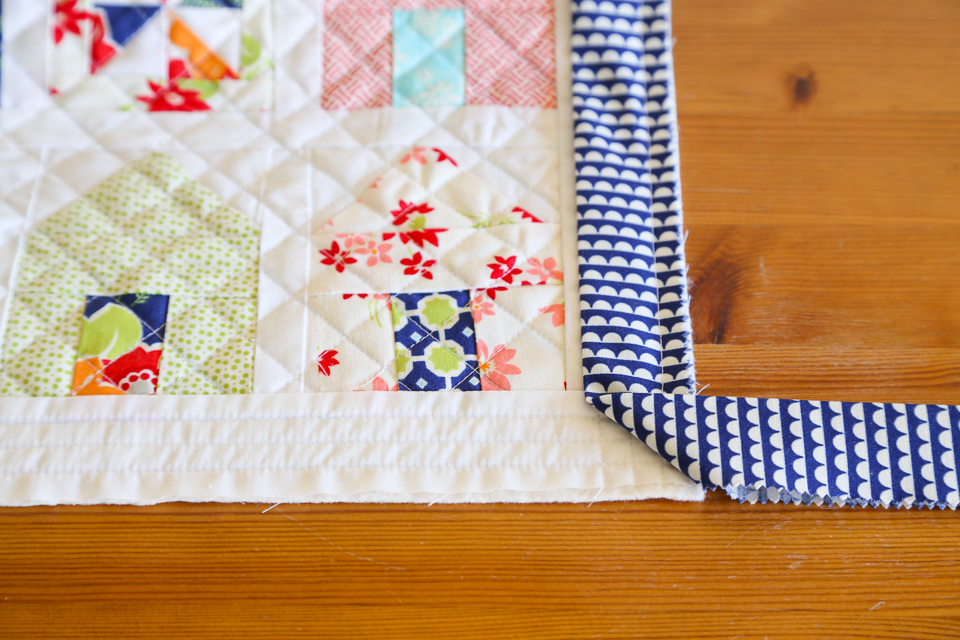
![]() Bring the binding back over to the left, along the bottom edge. You will see your mitered corner formed.
Bring the binding back over to the left, along the bottom edge. You will see your mitered corner formed.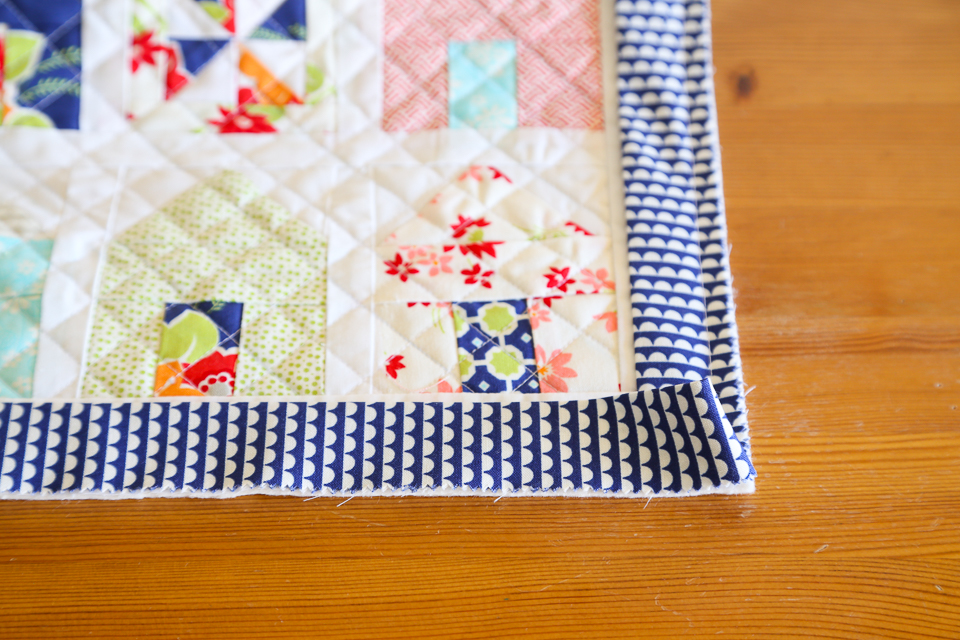
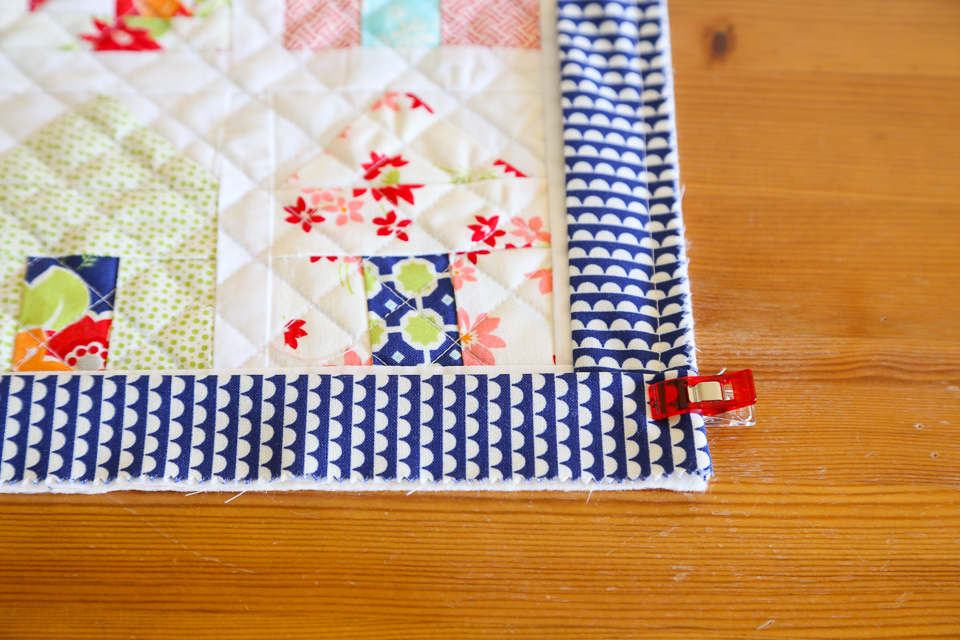
![]() Clip down your newly formed perfectly mitered corner.
Clip down your newly formed perfectly mitered corner.
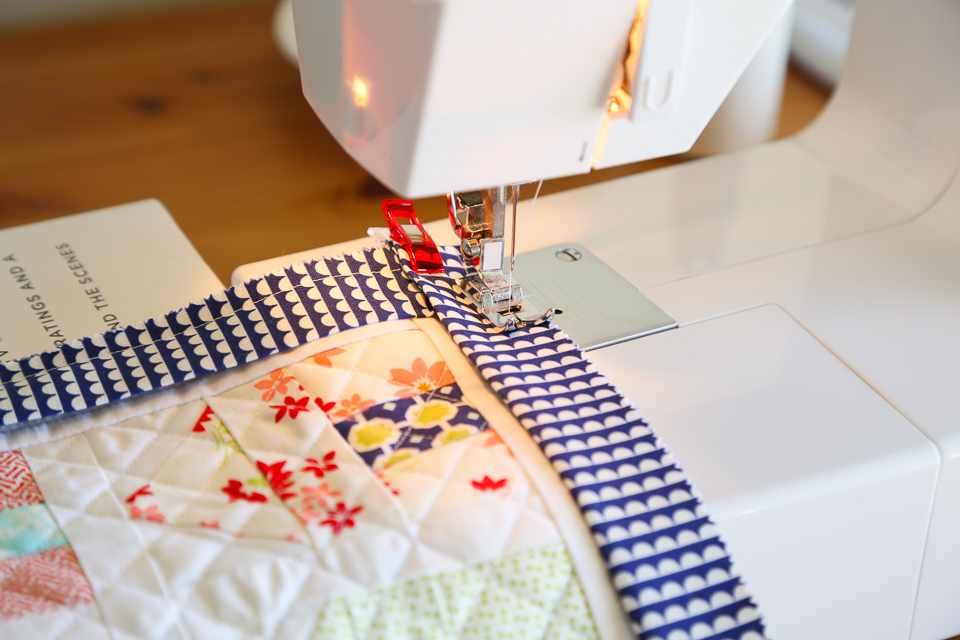
![]() Flip your quilt around and start sewing along that edge, 1/4″ seam. Do the same to all corners:
Flip your quilt around and start sewing along that edge, 1/4″ seam. Do the same to all corners: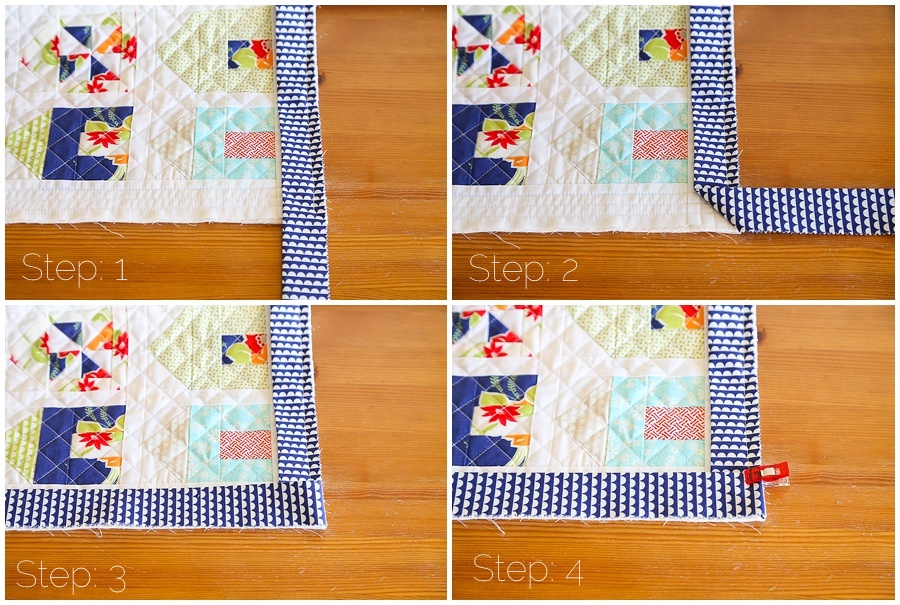
![]() When you finally get back to the first side you started with, measure your remaining binding against the beginning of the binding and cut at a diagonal.
When you finally get back to the first side you started with, measure your remaining binding against the beginning of the binding and cut at a diagonal.
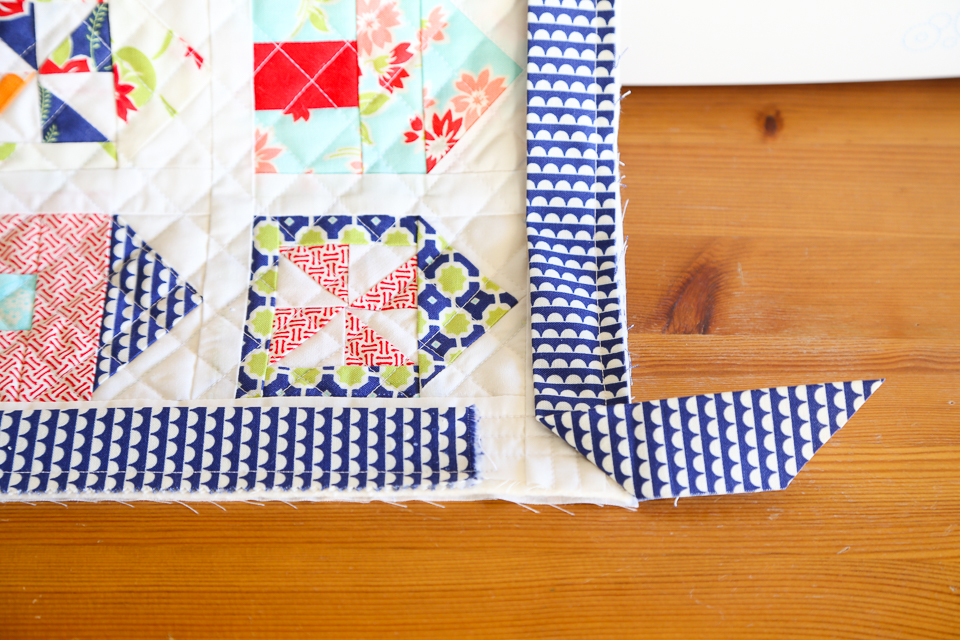
![]() Miter the corner and sew 1/4″ seam.
Miter the corner and sew 1/4″ seam.
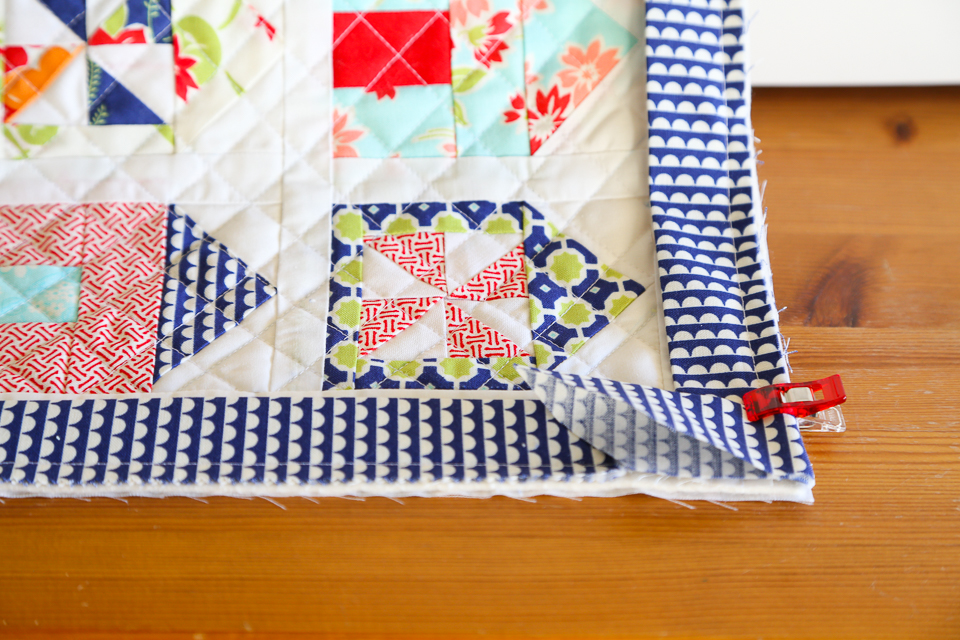
![]() Tuck in the binding and sew closed. 1/4″ along edge. Back stitch a few stitches to set your stitches.
Tuck in the binding and sew closed. 1/4″ along edge. Back stitch a few stitches to set your stitches.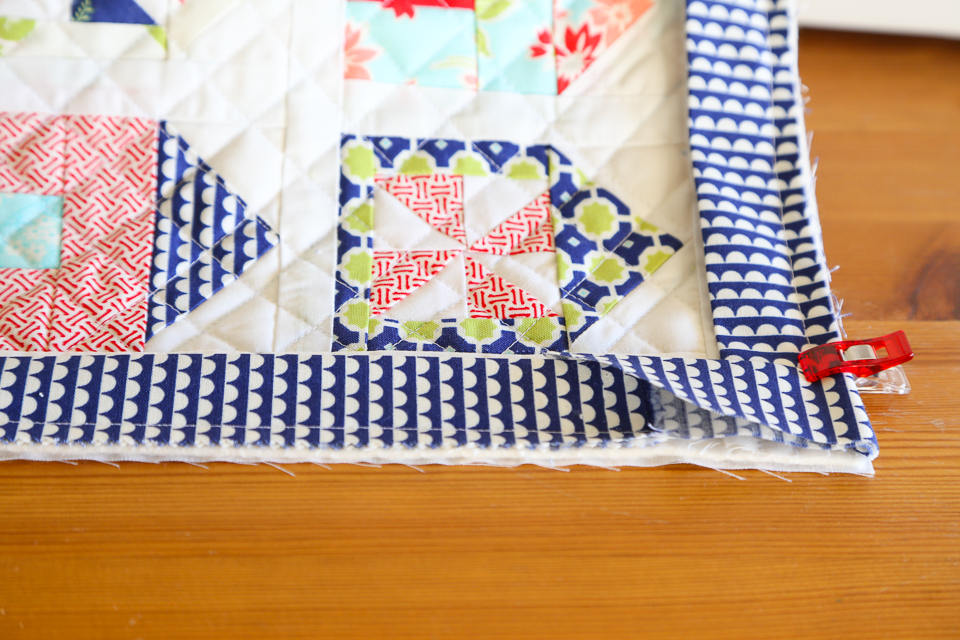
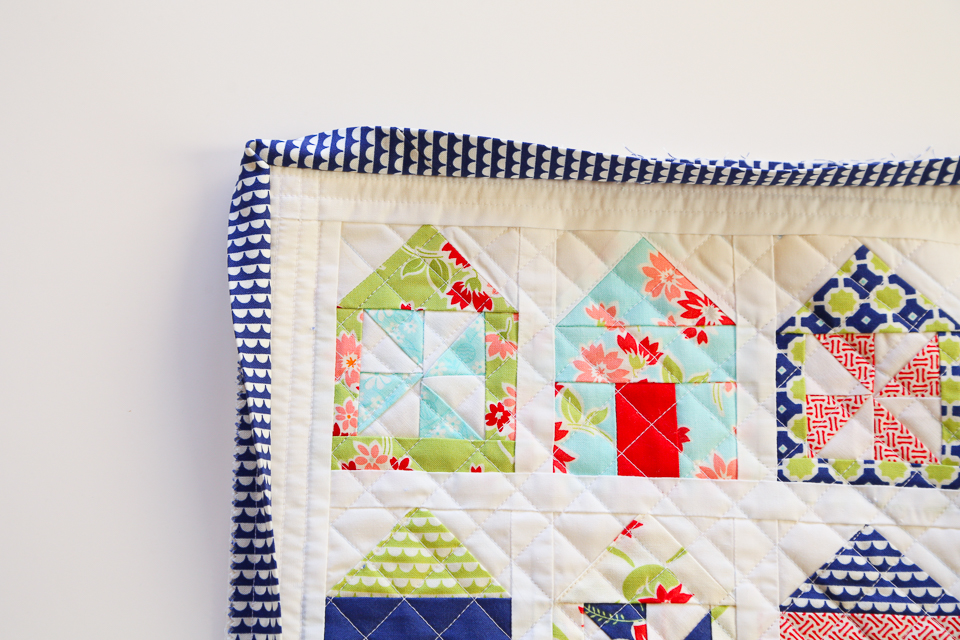
![]() You have now finished the binding of the front of the quilt! Take a moment to admire…
You have now finished the binding of the front of the quilt! Take a moment to admire…
![]() My little mitered corner. How I love you.
My little mitered corner. How I love you.
![]() This step is optional: You can press your binding down from the front before you attach it to the back. I only do this because I like the crease and I want my binding to be able to pull to the back tightly.
This step is optional: You can press your binding down from the front before you attach it to the back. I only do this because I like the crease and I want my binding to be able to pull to the back tightly.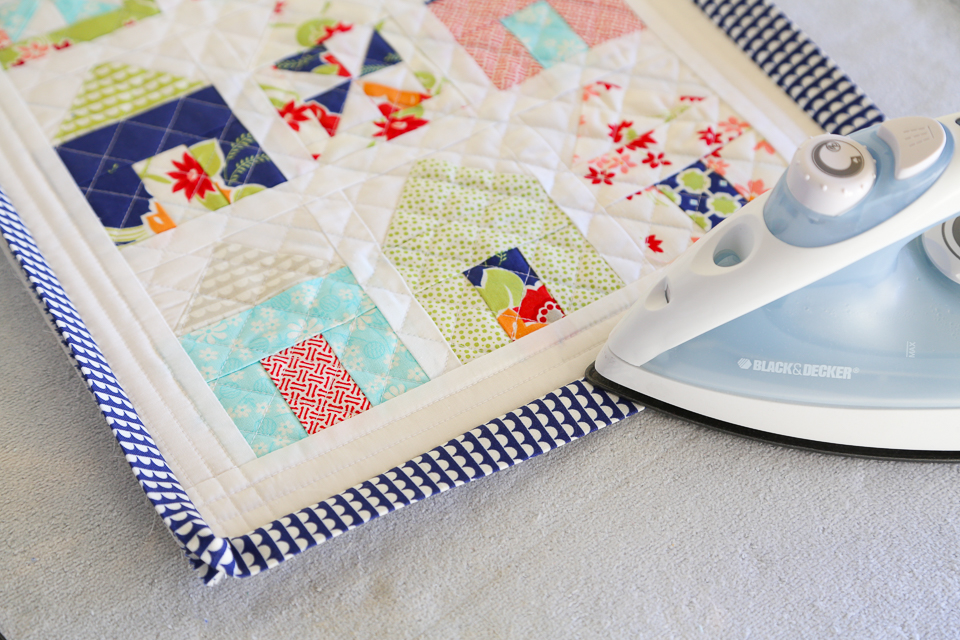
![]() Clip the entire binding to the back of the quilt. Yes, yes I do use a lot of clips! I told ya – extra tight, extra perfect for me please! :)
Clip the entire binding to the back of the quilt. Yes, yes I do use a lot of clips! I told ya – extra tight, extra perfect for me please! :)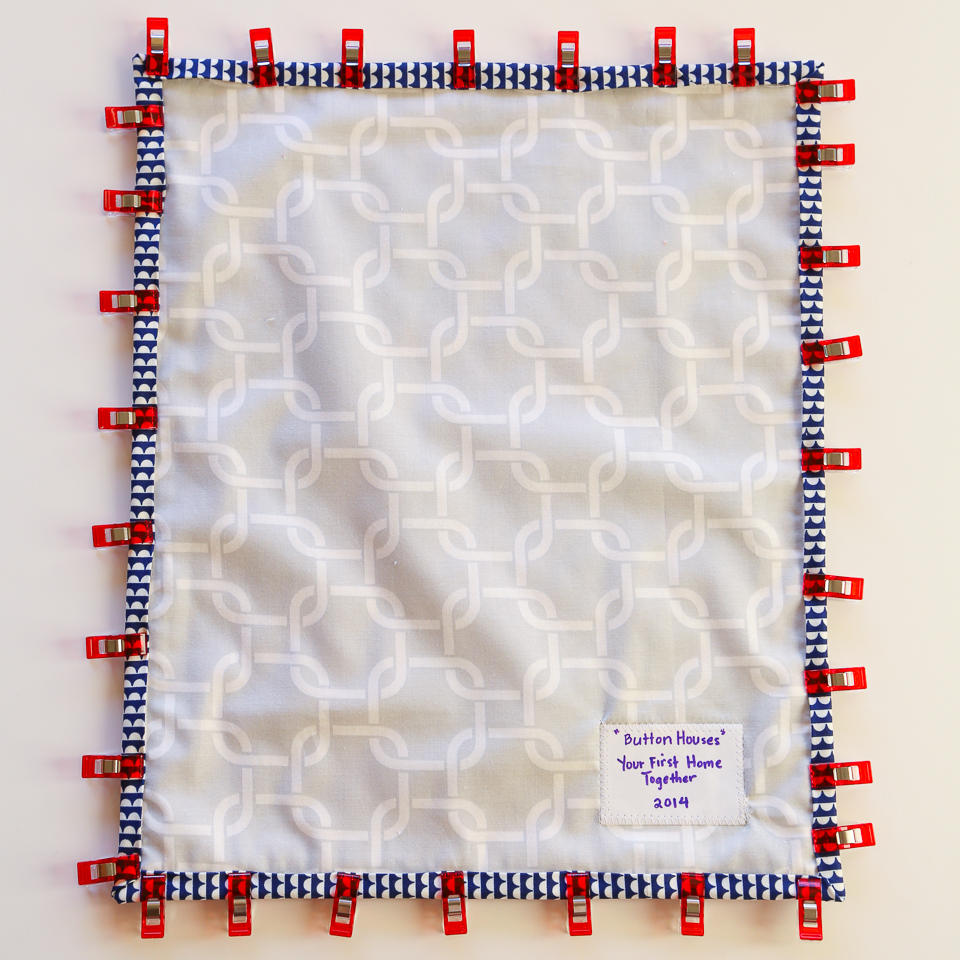
![]() Make sure to use an extra clip to hold down your corners.
Make sure to use an extra clip to hold down your corners.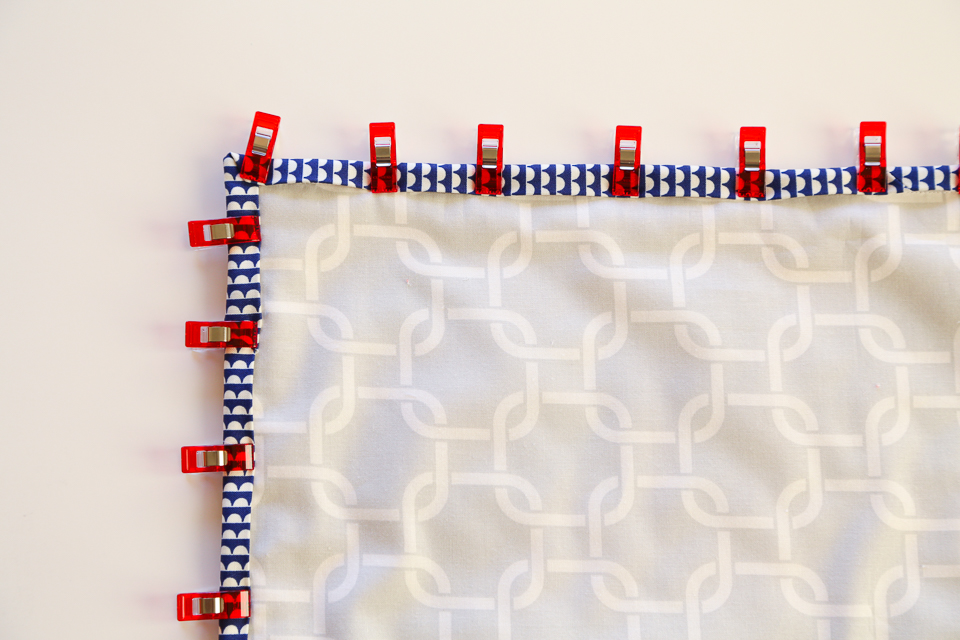
![]() At this point, you can machine sew your binding down in the back all the way around OR you can hand sew it down. Takes much longer to hand sew the binding down, but it is worth it. I use the blind stitch technique and there’s a tutorial for that :) Find it here: How to Blind Stitch Quilt Binding
At this point, you can machine sew your binding down in the back all the way around OR you can hand sew it down. Takes much longer to hand sew the binding down, but it is worth it. I use the blind stitch technique and there’s a tutorial for that :) Find it here: How to Blind Stitch Quilt Binding
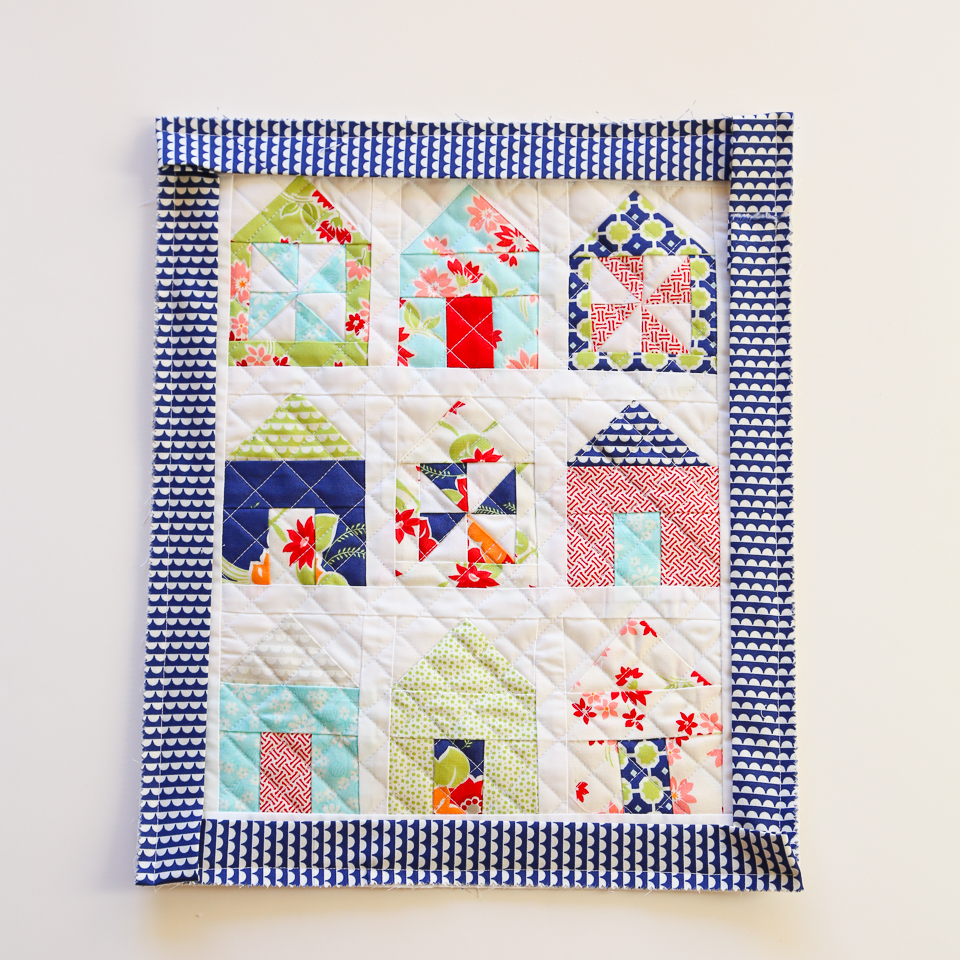
You can see photos of the finished mini quilt from this tutorial here: Little Houses Mini Quilt
Lots of Love,
Susie
Was this tutorial helpful? Leave a comment! :)

.jpg)