.jpg)
![]()
Stormtroopers go grocery shopping too!
![]()
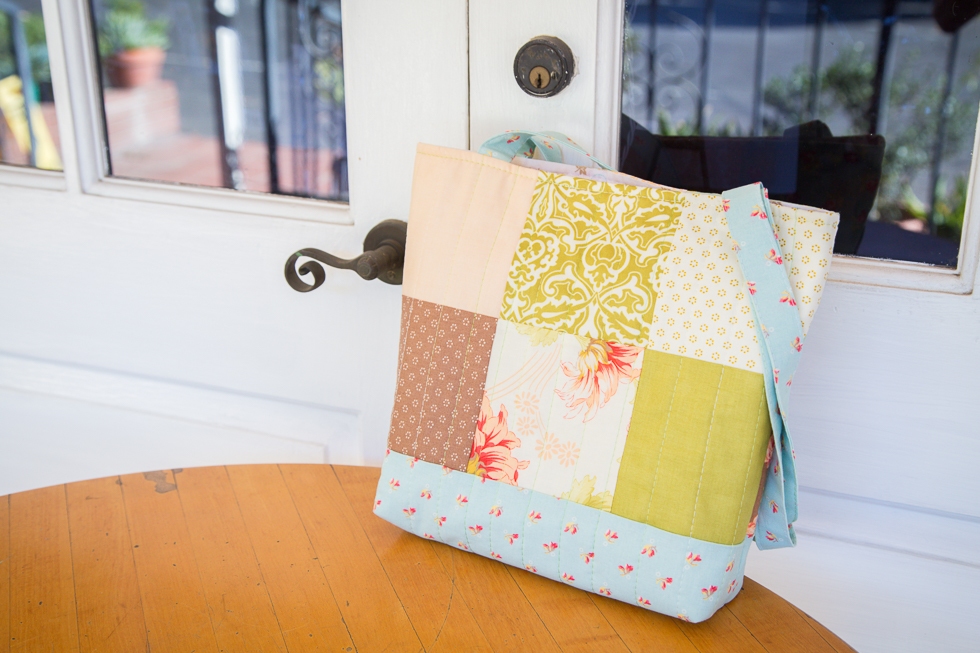
Here’s a free tutorial for a simple tote bag that uses charm squares! No problem if you don’t have any charms. You can easily cut your own.
*This project uses 1/4″ seam allowances through out.
Fabric Requirements
(A) – 12 charm squares or 12 – 5″ x 5″ fabric squares
(B) – 14″ x 8″ fabric piece (middle)
(C) – 26″ x 14″ fabric piece (lining)
(D) – 20″ x 4″ (straps)
Batting – 27″ x 15″ piece
Additional Materials: Self Healing Rotary Cutting Mat, Quilting Ruler, Rotary Cutter, Quilt Batting, Wonder Clips
Instructions
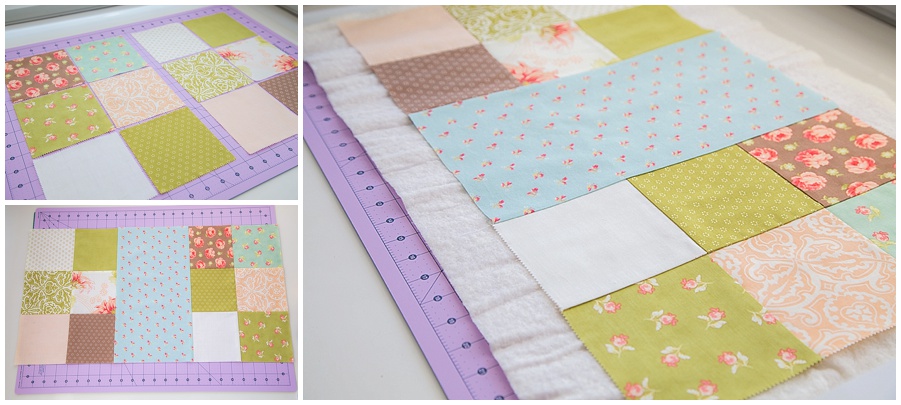
1. Sew together two sets of 6 charm squares. Sew middle piece (B) in the middle. Set atop batting piece.
![]()
2. Quilt as desired, then trim excess batting pieces. This is your outer shell.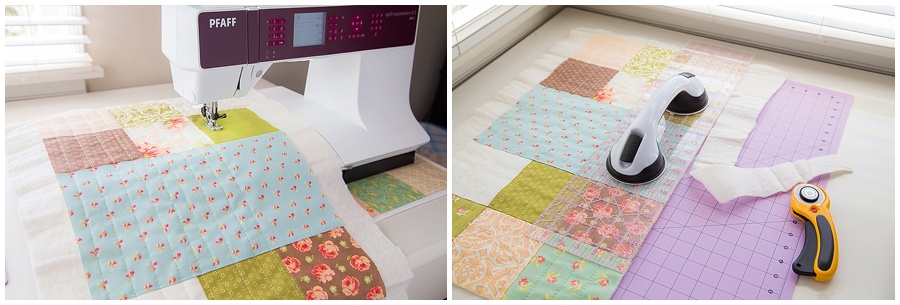
![]()
3. Fold outer shell (wrong sides together) in half and sew the sides together. Then box both lower corners 1-1/2″ in. Trim corners.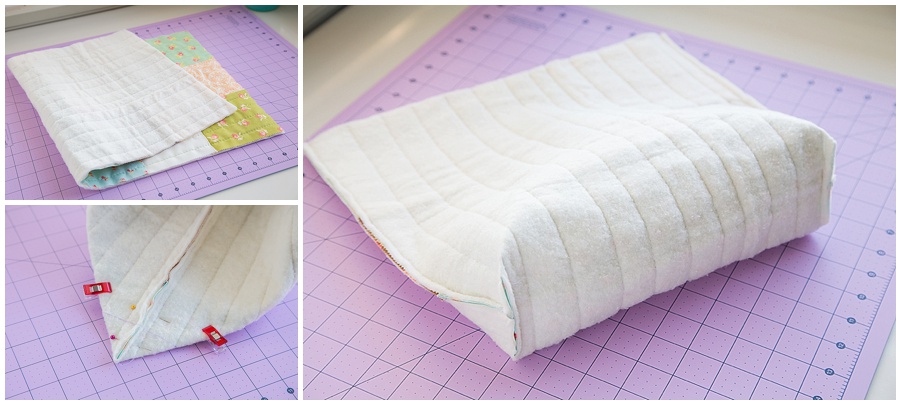
![]()
4. For your liner (fabric piece C), it is almost the same as the outer shell except that you need to mark a 6″ line on one side and DO NOT sew on the line (yet).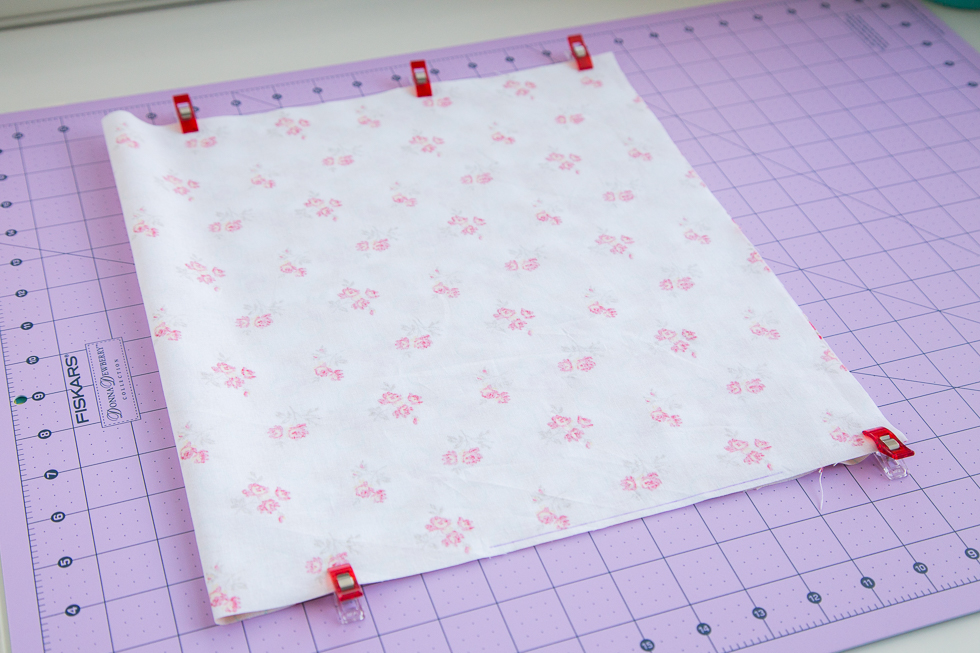
![]()
5. Box the corners and trim.
![]()
6. Straps: Press the fabric (D) in half then open back up. Fold the outer edges to meet the halfway mark, then press again. Topstitch both sides. Make 2 straps.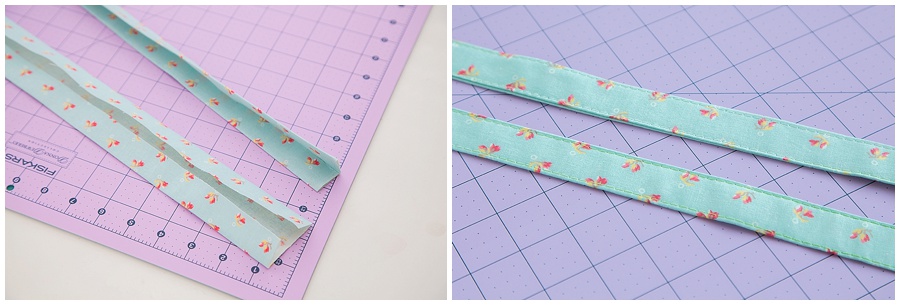
![]()
7. Place the [right-side-out] lining inside the [wrong-side-out] shell and clip together at the outer seams. Then place the straps in between the shell and lining. Place the straps at 2″ from the outer seams and allow 1/2″ of the strap to show. Pin to place. Repeat on the other side with the other strap.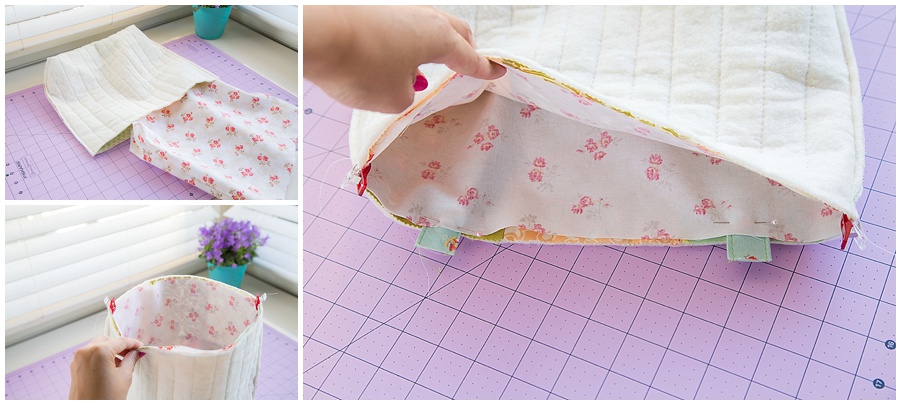
![]()
8. Sew together around the entire top of of the bag, removing pins and clips as you go.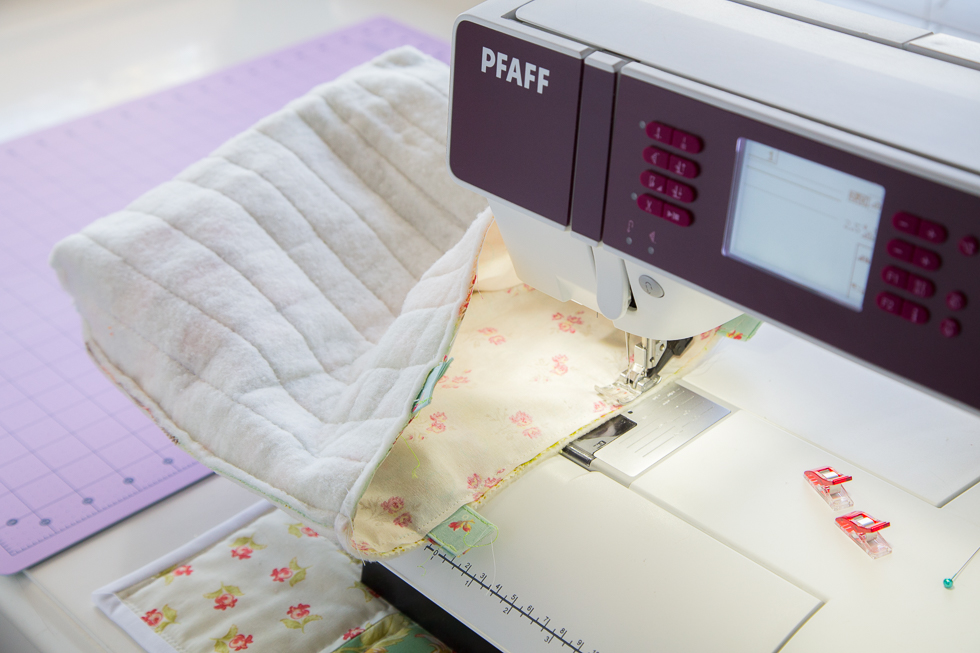
![]()
9. Flip the entire bag inside out through the opening left in the liner piece. Then sew this opening shut and push the liner back into place.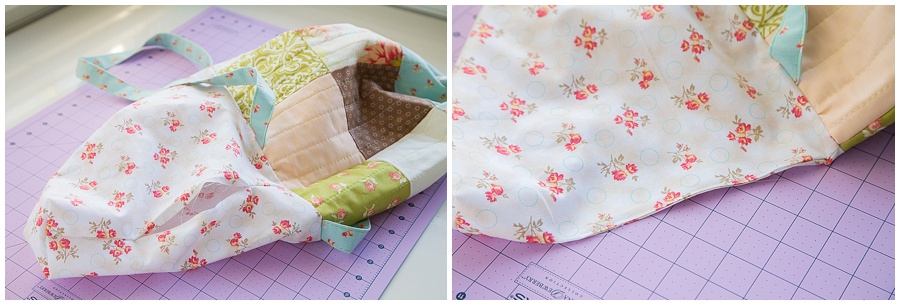
![]()
10. The final step! Topstitch at the top of the bag to help the liner stay in place. 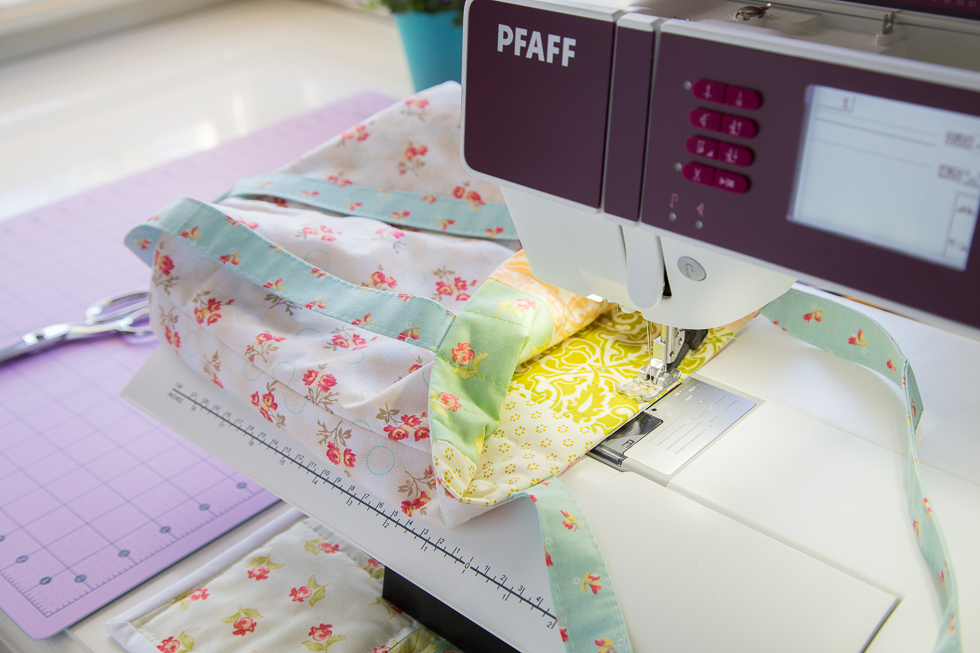
![]()
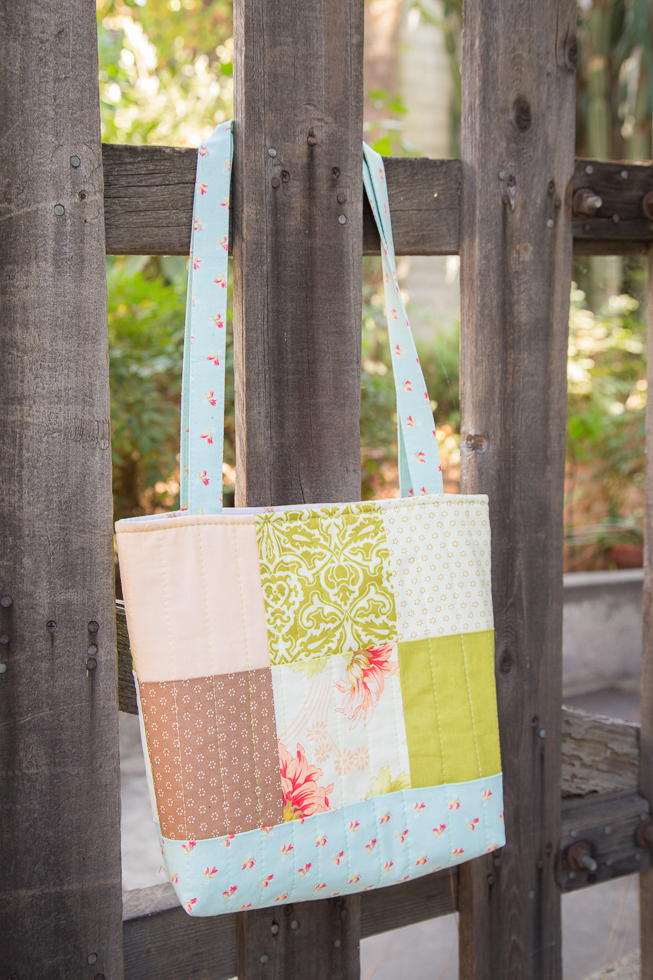
Ta-dah! All done!
![]()

![]()
![]()
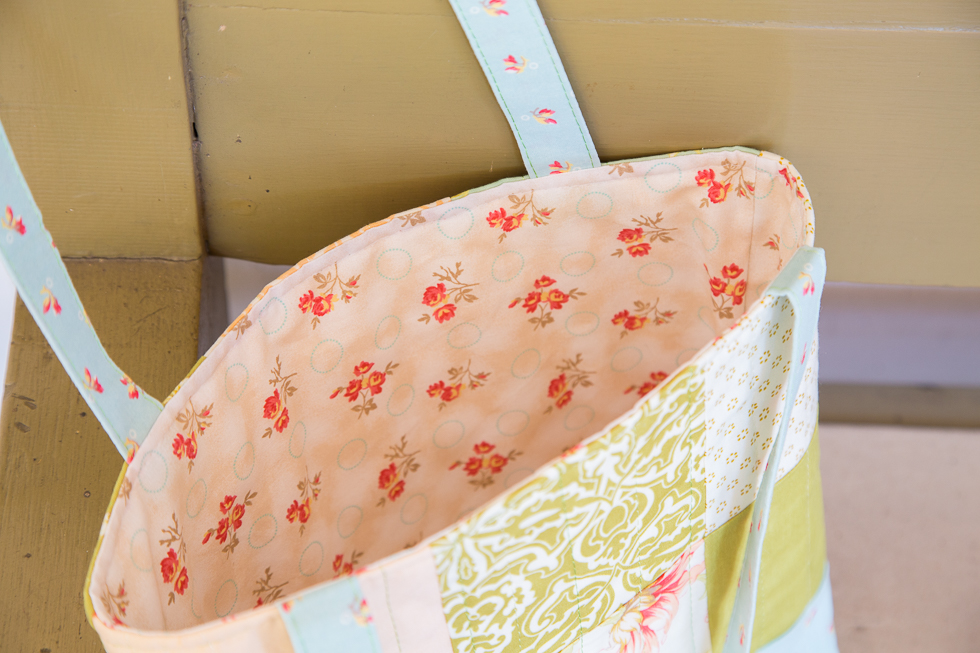
A peek inside to see the liner fabric.
![]()
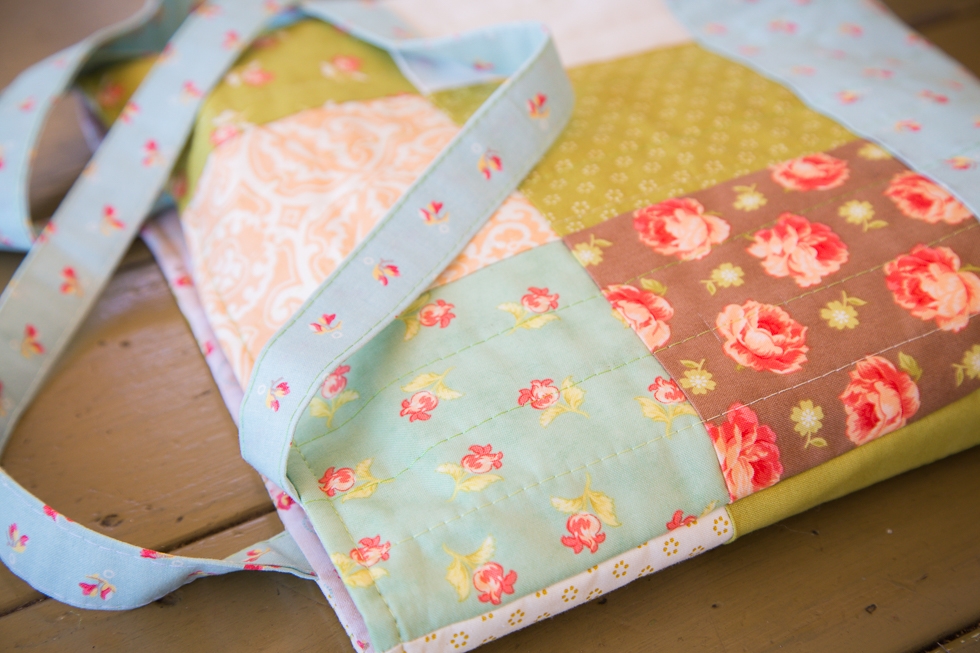
My favorite patch from the tote bag is this little green square with the little red flowers. So feminine and cute!
![]()
Have you tried this pattern? Let me know what you think!
Easiest tote bag I’ve made. Fabulous instructions!September 29, 2021 – 8:21 am
Thanks for the excellent tutorial – it was easy to follow and the tote was easy to make. I’ve made two and can’t wait to make more!September 20, 2020 – 12:04 pm
This bag is beautiful!
Thank you for the great tuto!!!July 11, 2017 – 4:54 am
This bag looks like fun to make- must give it a go.May 29, 2017 – 4:09 pm
PRETTY!May 29, 2017 – 2:42 pm
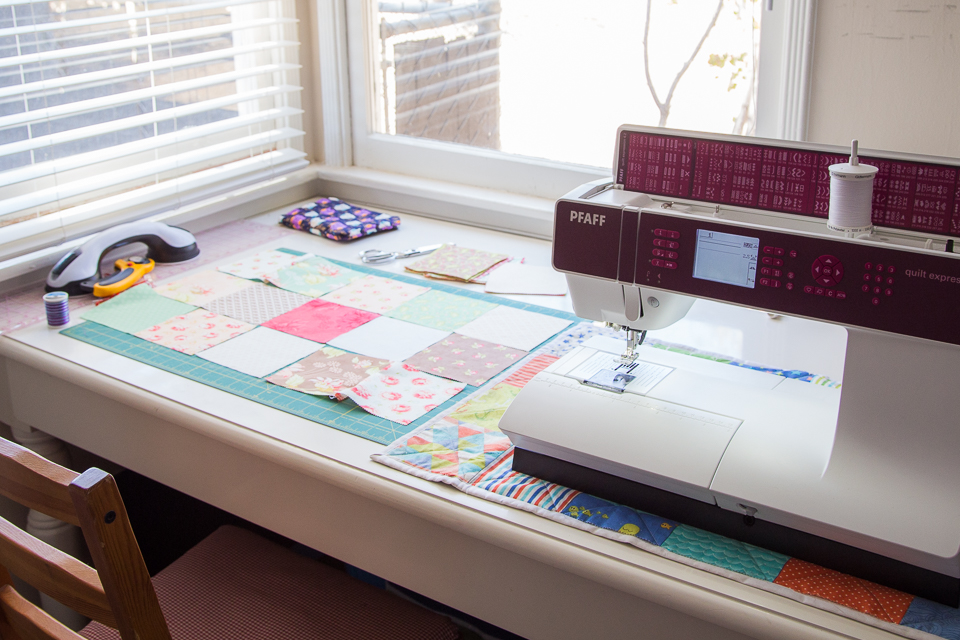
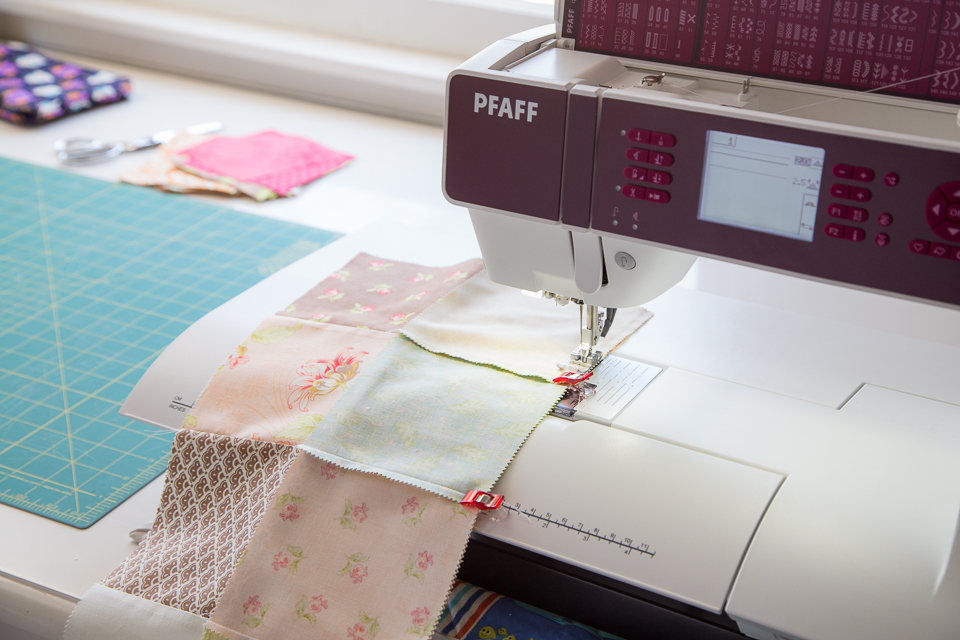
I’ve been doing a lot of organizing and trying to make the ideal workspace for myself. I really like the space that I have now. My favorite thing about it is all the natural sunlight! It keeps my sewing room bright and cheerful. I absolutely love my sewing space!
It is time for a new sewing machine mat. You might be wondering why I need a mat under my sewing machine. I move my sewing machine around a lot on the table. Sometimes I push it up against the wall to make space for measuring or writing. Sometimes I push it to the far edge to make space for my computer. Whatever the case may be, the fact is that I “push” it, rather than “carry” it. This sewing machine is like 40 lbs! I don’t want to carry it if I don’t have to. And if I didn’t have a mat under it, there would be marks left on my beautiful white table if I tried to push it! Therefore, I need this sewing mat.
The mat is just simple charm square patchwork from a remaining stack I have left from prior projects. I love the warm earthy colors.
![]()
![]()
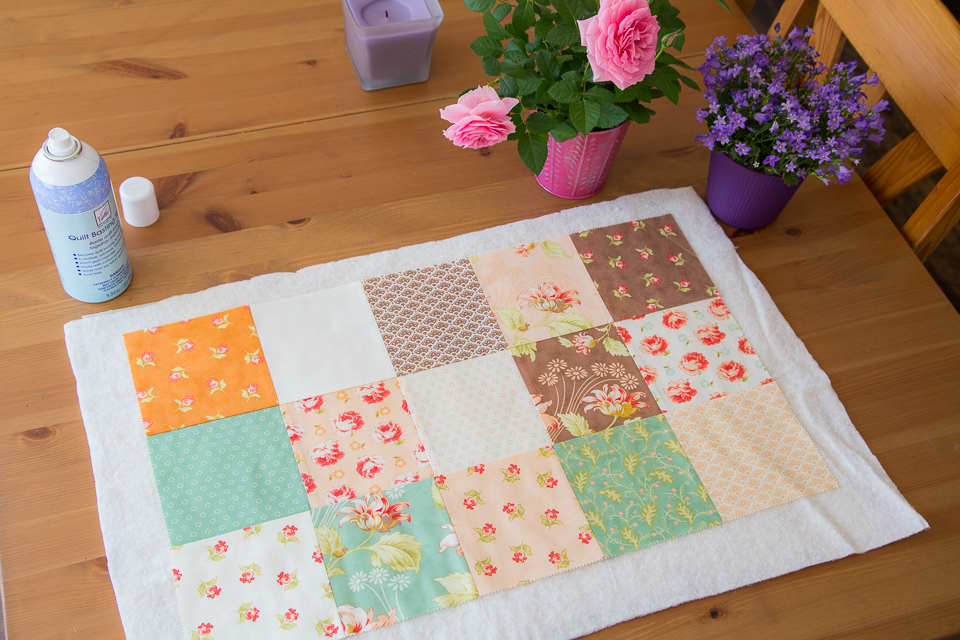
![]() I used June Tailor’s Quilt Basting Spray to make my “quilt sandwich.” (I did a review on this product a few months ago. I like it! Read my review here.)
I used June Tailor’s Quilt Basting Spray to make my “quilt sandwich.” (I did a review on this product a few months ago. I like it! Read my review here.)
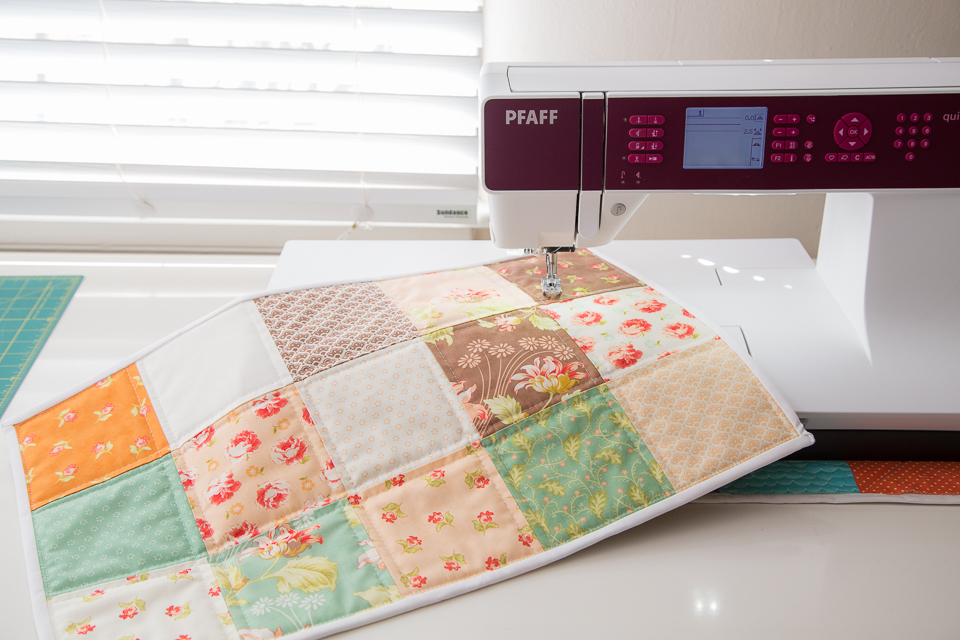
![]() Quick and easy… finished in just an hour!
Quick and easy… finished in just an hour!
![]()
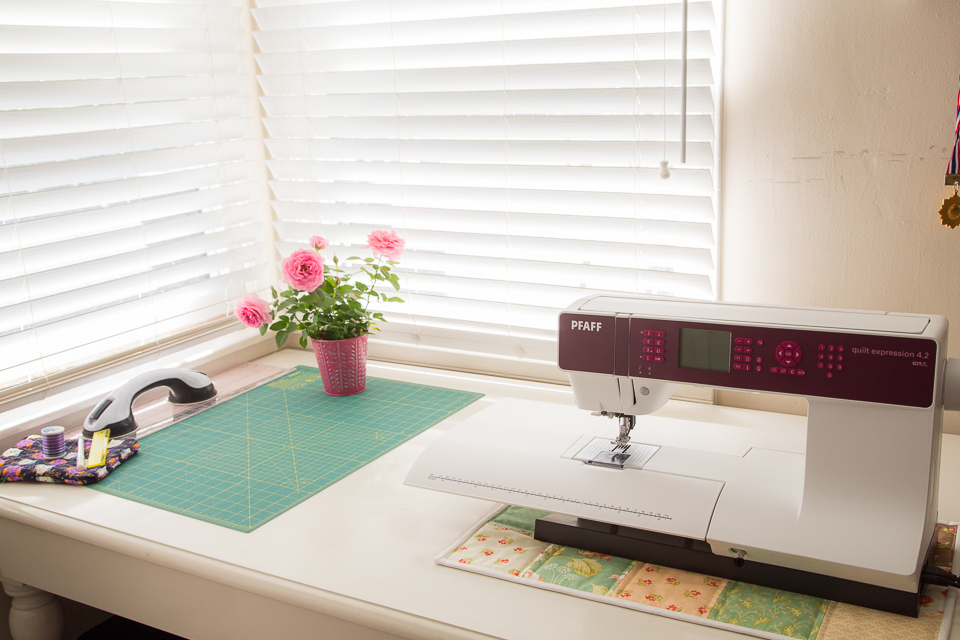
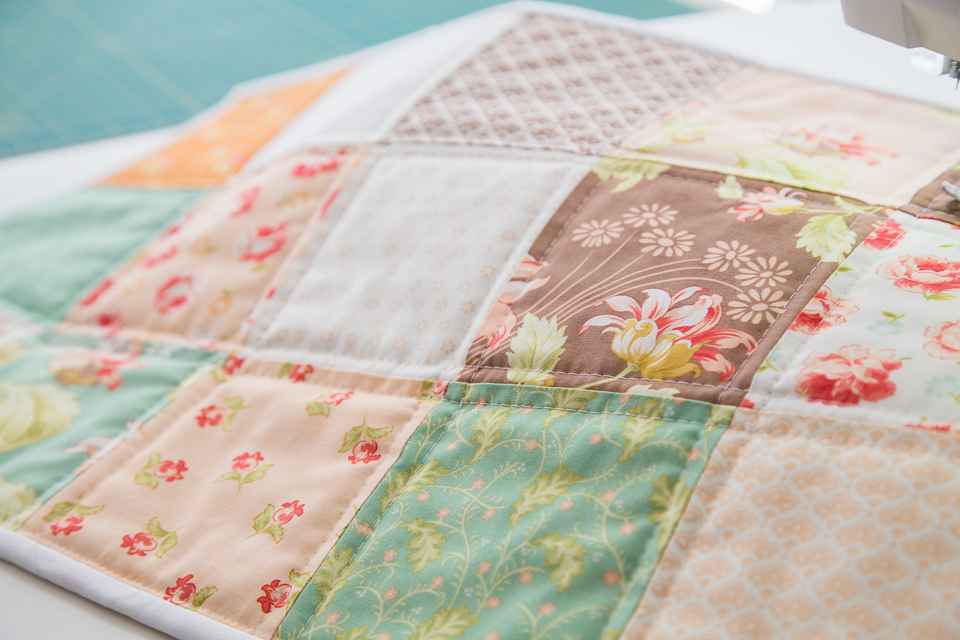
![]() I think my workspace looks better with the new mat. I love the fabric colors and my little pot of roses adds another feminine touch to the space!
I think my workspace looks better with the new mat. I love the fabric colors and my little pot of roses adds another feminine touch to the space!
Do you like it? Do you use a sewing machine mat as well? Am I the only odd person that constantly moves my sewing machine around on a daily basis?
Thanks for stopping in today to see what’s been happening at Pinwheel Cottage!
Lots of love,
Susie :)
I really like your sewing machine mat. Fig Tree Quilts makes some of my favorite fabrics and Strawberry Fields Revisited is a favorite of mine. Love the bright corner window you have.
Happy Sewing.June 26, 2017 – 5:02 pm
Yes, I agree! I LOVE Strawberry Fields revisited too! I have them in mini-charms and still thinking up ideas on what to make with it! Thanks for visiting my blog today ;-)July 5, 2017 – 7:35 pm
![]() This is a step-by-step tutorial on how to sew TWO half square triangles, using two square pieces of fabric.
This is a step-by-step tutorial on how to sew TWO half square triangles, using two square pieces of fabric.
I am currently working on a quilt project that requires half square triangles and as I was sewing these, I realized it wouldn’t take too much time to put together a quick tutorial with some photos. Are you ready? Here we go!
Materials Used:
Fabric Charm Squares or any fabric that are square in measurement.
Cutting Mat, Ruler, Rotary Cutter
Take two square pieces of fabric, both of the same size. These are 5″ by 5″ each. On one of the fabric pieces, draw a diagonal line through it.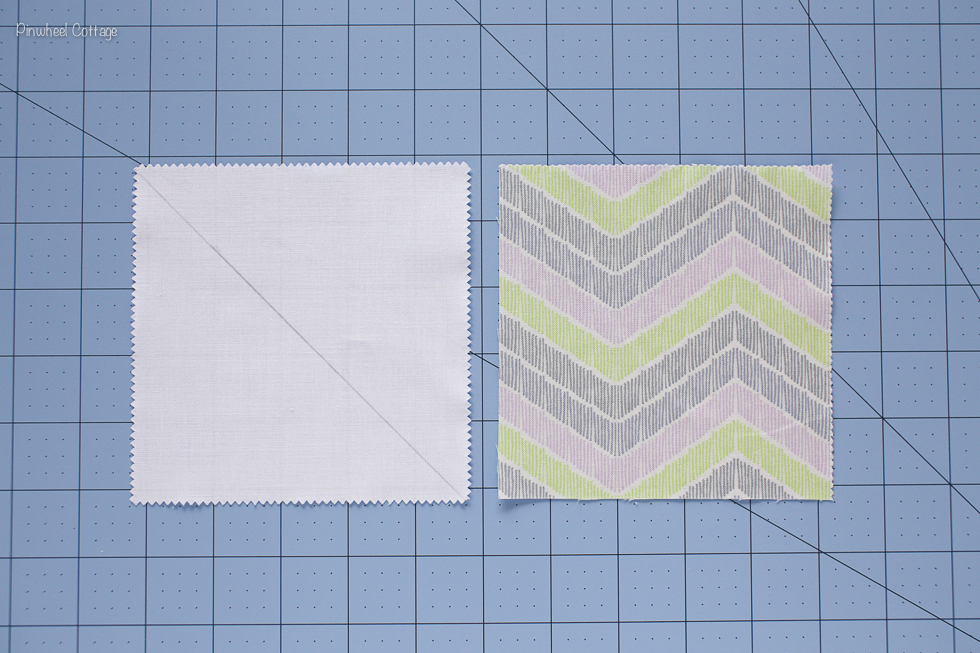
![]()
Place the fabric piece with the diagonal line on top of the other piece (right sides together), and sew along both sides of the line. Use 1/4″ seam allowance.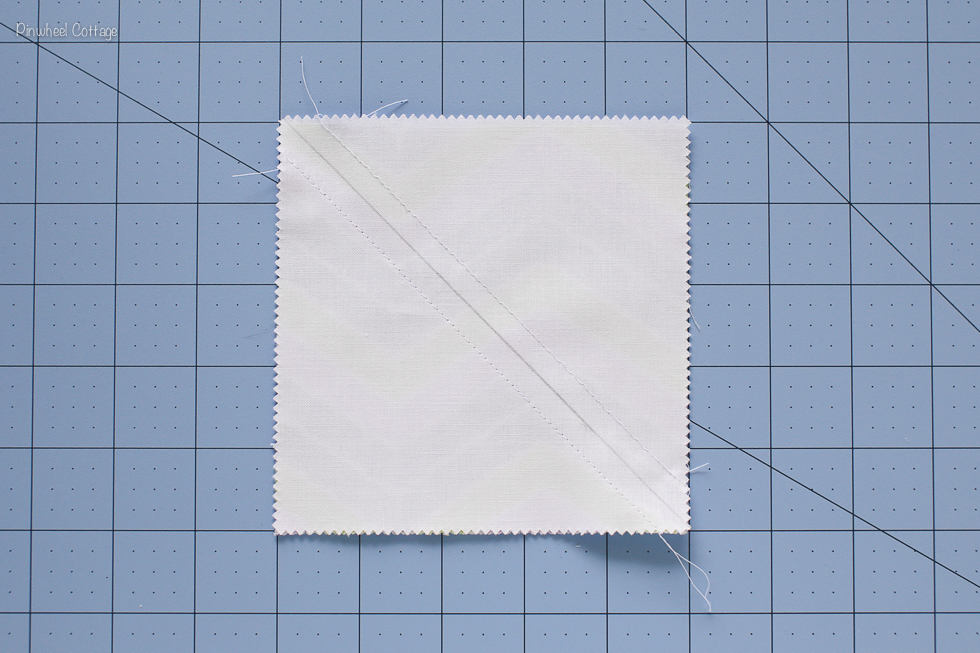
![]()
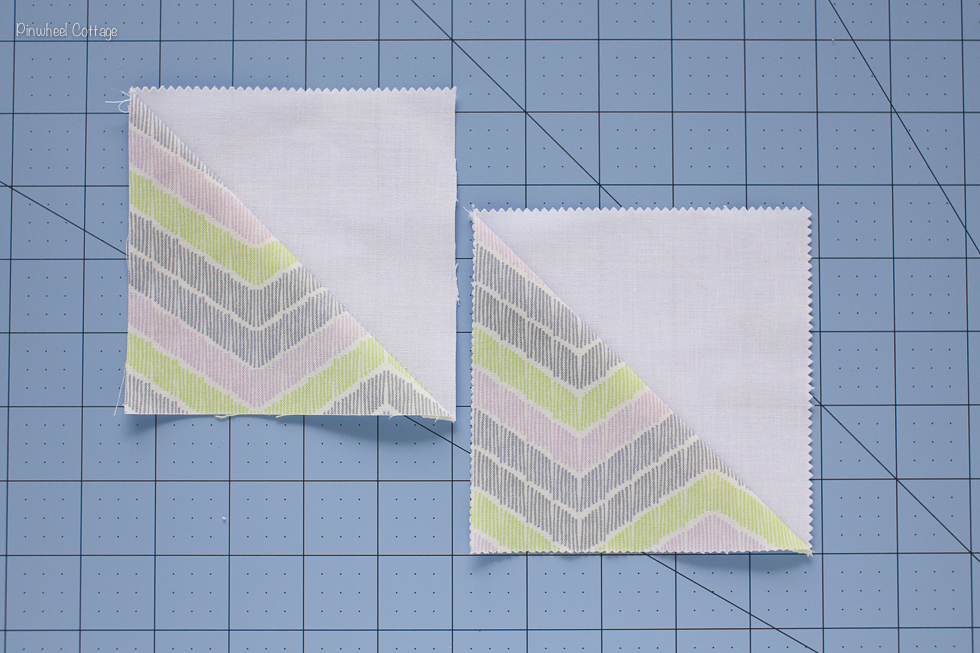
Cut through the diagonal line to separate the two triangle pieces. Trim away the thread tails and clip the corners.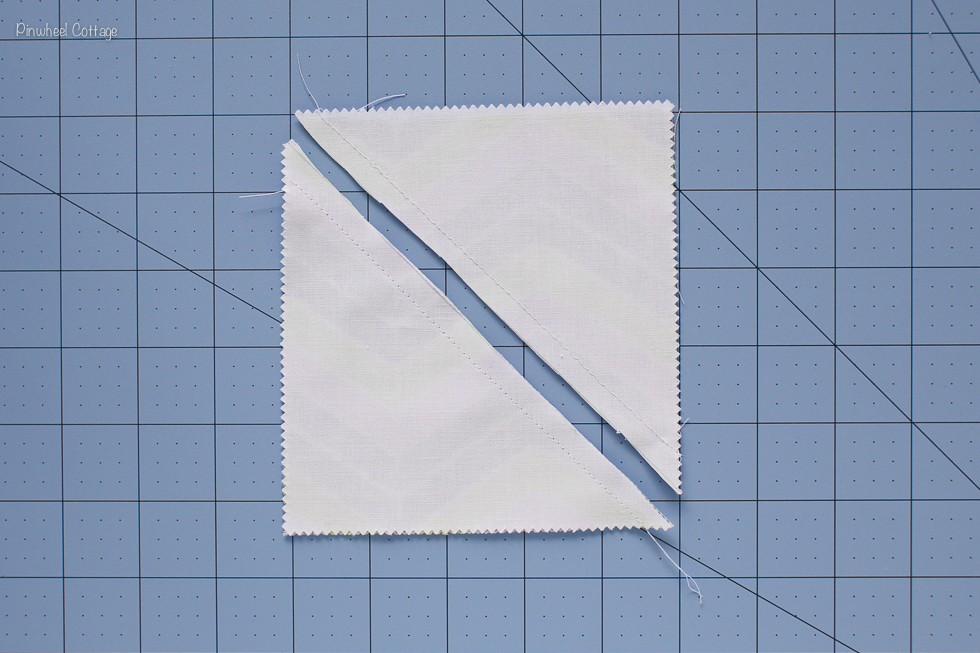
![]()
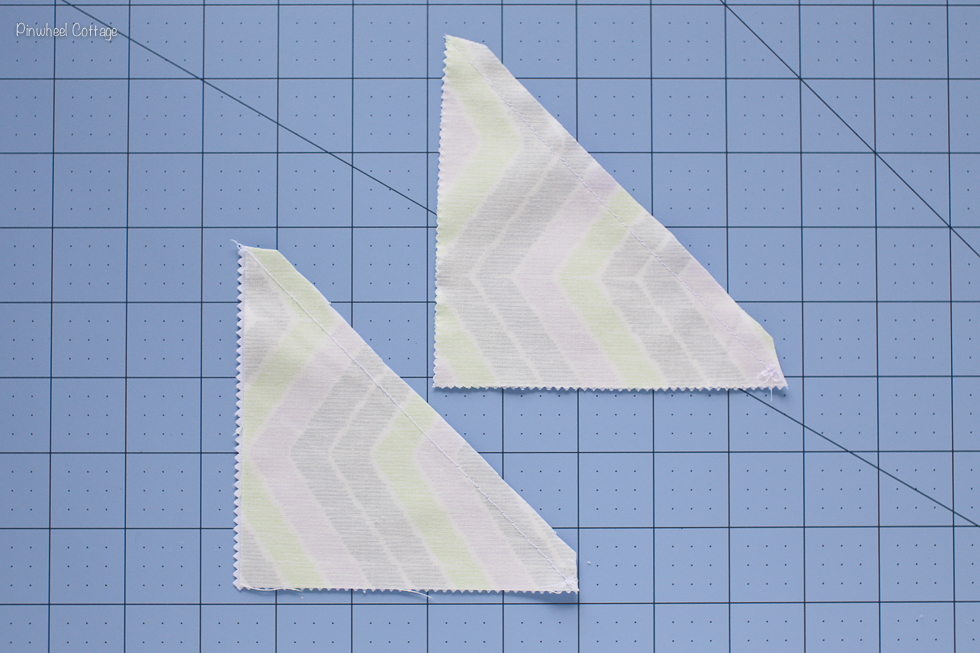
![]()
Press open and there you go! Two half square triangles! Aren’t they pretty? :)
![]()
Here are some projects I have done using half square triangles.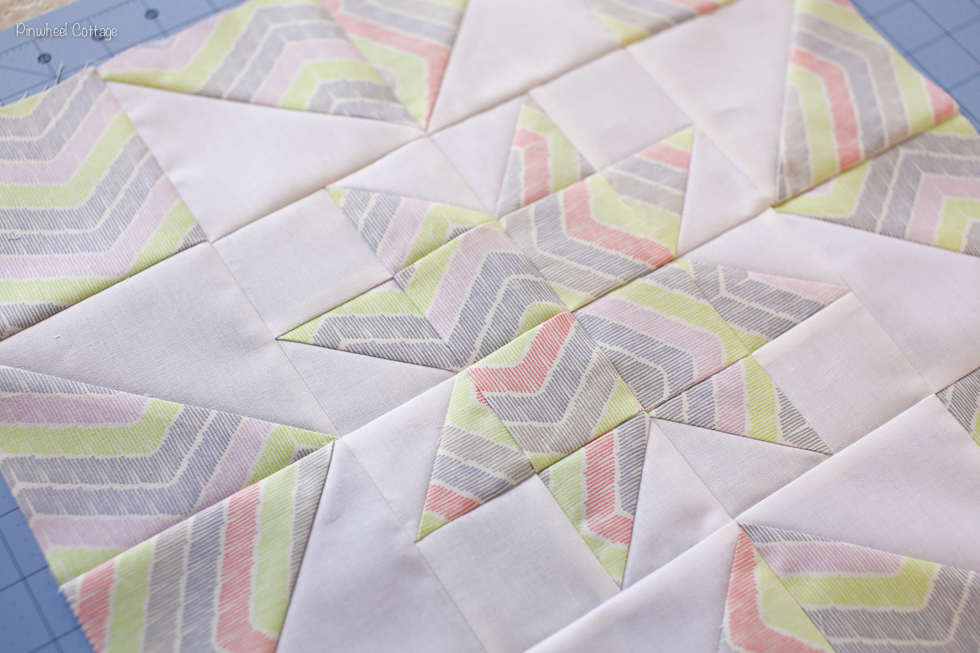
![]()

![]()
![]()
I hope you found this tutorial helpful! What will you make with half square triangles?
Until next time…
Susie :)
Great tutorial. Thank you. I love straight forward simple instructions with pictures. Perfect!July 14, 2019 – 1:04 pm
Thank you sooo much!!! I cannot wait to get started!!August 13, 2017 – 11:12 am

.jpg)